The Takeaway: You don’t need to be an HVAC (Heating, Ventilation, and Air Conditioning) professional to install a ductless heating and cooling system. MrCool developed a DIY system where each component comes pre-charged with refrigerant, which is released once everything is connected, eliminating the need for technician to set up the unit. So, with minimal special tools, plus a little home repair or DIY experience, anyone can install one of these mini-split heating and cooling systems.
- Models available for 120 and 240 volts, from 12,000 to 36,000 BTUs
- One system provides both heat and air conditioning
- Ideal solution for shops, garages, studio spaces, or even sheds
Buy 12,000-BTU, 120-Volt System
The min-split system air handler mounts on a wall inside the home.
Courtesy
What is a Ductless Mini-Split System?
A traditional window, or portable, air conditioner has the compressor, fans, and controls combined in one unit. Split systems break the components into two parts: an indoor air handler and an outdoor compressor. This keeps you from having to set aside too much space inside your home for the equipment. A lineset connects the two components and carries refrigerant and communication cable. Typical central air systems are split systems. You’ll need a mini-split either when your home lacks existing ductwork to carry the cooled—or heated—air or when a specific, smaller area cannot be reached with the existing HVAC system, as may be the case with a detached garage or workshop.
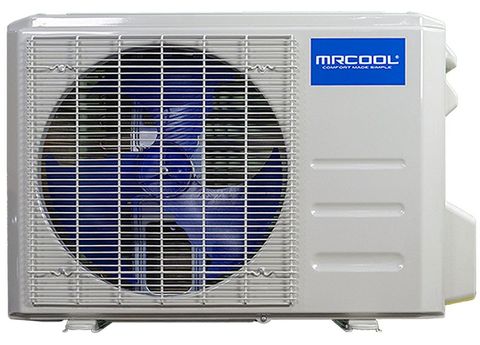
The mini-split system compressor sits outside the home.
Courtesy
What is a Heat Pump?
Heat pumps can both heat and cool your home. In the winter, coils in the outdoor unit absorb heat in the air—however improbably that seems—and bring it into your home. In the summer, the system works in reverse. Coils in the air handler inside absorb heat and send it outside. Many heat pumps will work down to about 5 degrees Fahrenheit, at which point performance degrades and they become less efficient.
The MrCool DIY Mini-Split Heat Pump is Different
Traditionally, the lineset connecting split and mini-split systems is made of copper. The set has two lengths of tubing with special flared fittings that connect the indoor air handler with the outdoor compressor. Because the tubing is open on both ends, once it’s connected, a technician needs to use a vacuum pump to draw all the air out of the lines. Once the air is evacuated, they then have to fill and pressurize the lines with refrigerant, a gas that absorbs the heat or cold and moves it from one unit to the other.
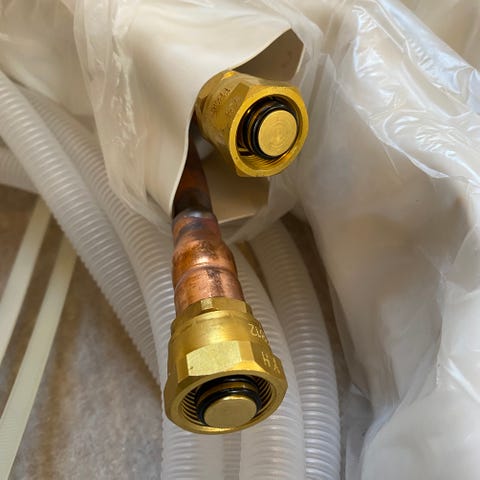
The MrCool lineset comes pre-charged with refrigerant. This is made possible due to sealed fittings that automatically open once connected.
Bradley Ford
MrCool’s DIY lineset comes pre-charged with refrigerant and special sealed fittings on the ends. When you screw in and tighten the fittings, the sealed ends open, connecting the system and releasing the refrigerant. Because of this, the entire system is pressurized and charged once connected—no technician or special HVAC tools required.
Why I Chose the MrCool System
My family lives in an old farmhouse with outbuildings, specifically a summer kitchen. These structures were common in this area of eastern Pennsylvania more than a hundred years ago. In the hot summer months, cooking was done on the large hearth in that kitchen to help keep heat out of the house. Over the past few years, I’ve been working to rehab the space to make use of it as a studio and office. Originally, I was going to put in a propane forced-air furnace. However, working from home during the pandemic got me considering the need for a comfortable, year-round workspace—without having to resort to a/c units hanging out the windows and portable heaters.
Whenever I can, I do the work myself to keep costs down. The MrCool system was the simplest and least expensive way for me to install both heat and air conditioning, permanently. The only potential drawback of the system is that it works down to 5 degrees Fahrenheit. Below that, performance and efficiency will drop off. Since we have no plumbing in the structure, there’s no real danger of it getting too cold—plus, there is a fireplace we can use for supplemental heat if needed. At any rate, we only get a handful of days a year down around zero, so I’m not too concerned about it. This system made the most sense for me.
These systems make sense for a lot people, too. They’re great solutions for heating and cooling needs in specific areas without expanding existing HVAC systems or where no systems exist. While they’re especially useful in detached structures like mine or garages, sheds, and workshops, you can also employ them in older houses with rooms that are typically too hot or cold depending on the season.
Our summer kitchen is 320 square feet, plus a small loft area. I researched mini-splits for a while, and the MrCool 12,000-BTU, 120-volt model will heat/cool up to 500 square feet. So, since I already had a dedicated circuit run for the propane furnace, it made the decision easy. I ultimately purchased the MrCool DIY kit from an online retailer. The structure is insulated well, and during the first week I had the system running, the outside temperature averaged around 20 degrees. The MrCool doesn’t seem to be working very hard to keep it at 62 degrees inside.
Installation
The tools you’ll need to install the system are basic, for the most part. Many people will already have almost all of them. Here’s a list of the critical ones:
- Cordless drill, assorted bits
- 3.5-inch hole saw
- Impact driver, assorted bits
- Utility knife
- Two adjustable wrenches
- Level
- Phillips and flat screwdrivers
- Stud finder
- Pliers/wire cutters
Optional if installing the outdoor unit on a masonry wall:
- Rotary hammer drill
- 1/2-inch masonry drill bit
You’ll need an exterior disconnect box on a dedicated circuit for the mini-split system to connect to. The model I installed needed a 120-volt, 20-amp circuit. The disconnect box I used was a 60-amp, non-fused type (note that you can go to a higher amperage, but not a lower one). In a garage or workshop, you can often locate the unit close to the service or sub-panel and run wire in a conduit through the wall.
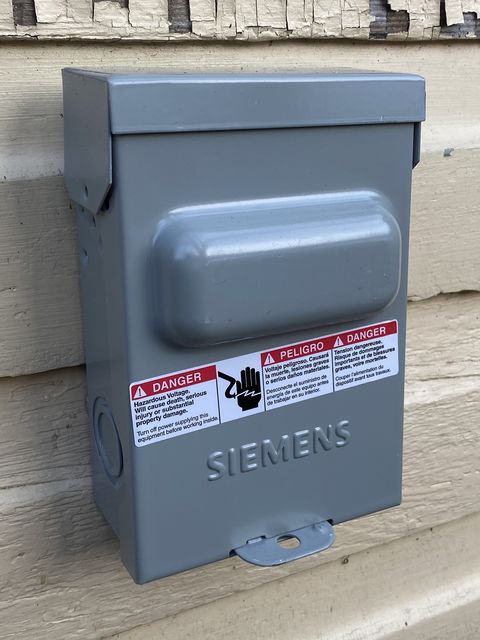
Electrical code requires an outdoor disconnect mounted near the mini-split to supply power to it.
Bradley Ford
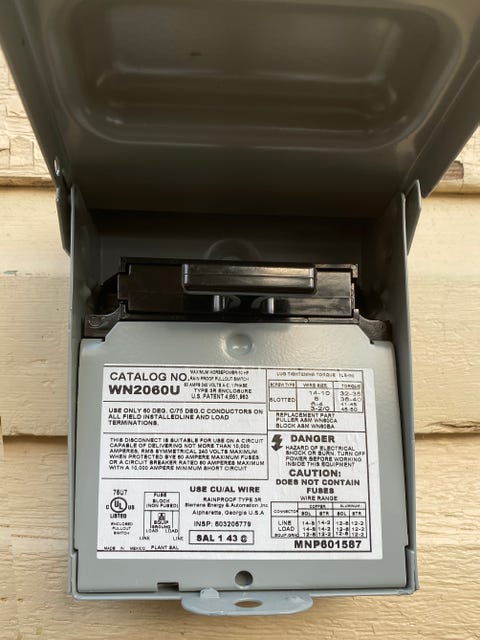
The disconnect has a pull-out head that physically breaks the circuit so that anyone working on the unit can be certain that power is off to the mini-split, even if the circuit breaker is flipped on.
Bradley Ford
You should check with local officials to see if permits are required and that your installation for the disconnect is up to code. And, if you’re unsure how to run the circuit, unfamiliar with electrical work, or have a long, complicated path to run the wire, you might consider hiring an electrician to install the disconnect.
MrCool Mini-Split Components
Installation of the MrCool system breaks down into the five basic steps I’ve outlined below. I chose to install the air handler on an interior wall, due to where I needed to situate the outdoor unit. This made installation a little more complicated. A typical installation would place the air handler on an exterior wall—I’ve noted the differences where appropriate.
Installing the Air Handler Inside
Installing the Compressor Outside
Connecting the Indoor and Outdoor Units
Connecting the Outdoor Unit to the Power Disconnect
Covering the Lineset
Starting Up
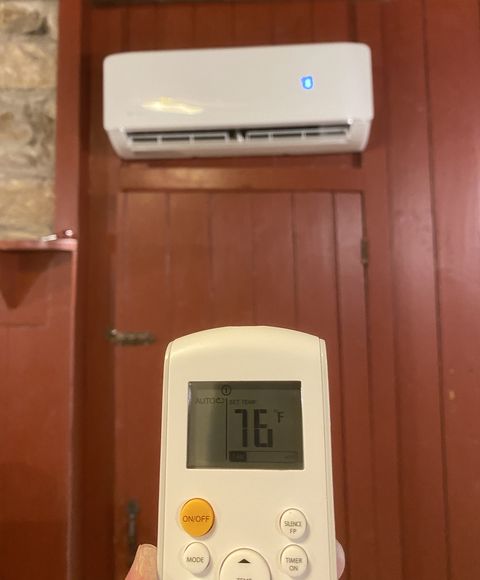
I put batteries in the remote, turned it on, set the thermostat, and it went right to work.
Bradley Ford
We’ve had the MrCool ductless heat pump running for almost two weeks now, and I’m very pleased with the purchase and the installation. Temperatures outside so far have been between 8 and 40 degrees, and the system has been maintaining a constant 62 degrees. The fan is remarkably quiet, so much so that I often walk over to the air handler to be sure it’s actually running.

12,000-BTU DIY Ductless Heat Pump Split System
$1,408.27
- Truly DIY; no HVAC pro needed to install
- Efficient 22 SEER rating
- 25-foot lineset means you might have extra line coiled up outside
This content is created and maintained by a third party, and imported onto this page to help users provide their email addresses. You may be able to find more information about this and similar content at piano.io
